FOR BARE-ROOTED PLANTS
As soon as you unpack your trees submerge the roots in water for an hour or two or at the very least hose them to ensure all root surfaces are damp. Then place the trees upright in a shallow hole and cover loosely with soil. Alternatively cover the roots with fine pine bark or other inert material in a bucket or trough with drainage holes. A suitable location is out of direct afternoon sunlight with good drainage. As long as the roots remain moist deciduous trees can safely be left like this until they begin to shoot in late Winter or early Spring.
FOR PLANTS IN LEAF
Remove packaging without delay and water plants thoroughly. Keep plants out of direct sun for the first day. After that plants can be safely kept in their pots in a sunny, protected position until ready for planting. Water regularly as required.
PLANTING
For best results prepare planting locations at least a few weeks before planting (professional orchardists may spend one or two years preparing for planting.)
1. Site Selection
Choose an area in full sun with good drainage and no root competition from nearby large trees. Good drainage means water soaks into the ground within an hour of rain or watering, leaving the soil around the roots moist, but not saturated.
2. Trellis Erection
Erect your preferred trellis system before starting on soil preparation.
3. Soil Preparation
Remove weeds. Break-up the soil profile if compacted, but avoid inverting or mixing soil layers – don’t bury topsoil under sub-soil. Lightly incorporate good compost or aged animal manure into the topsoil. While it is helpful to add organic matter to the planting area well in advance, using prepared fertilisers before trees are planted risks the loss of nutrients through leeching. Save the fertiliser until planting time.
4. Dig the Hole
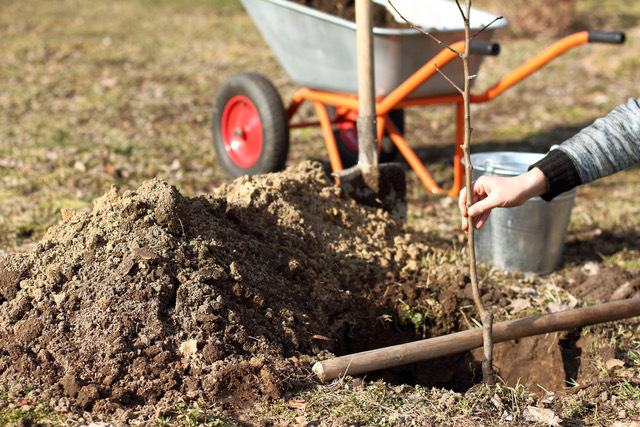
Dig planting holes before removing the trees from their storage place. That way if you get side-tracked for any reason the trees will be OK. Even better, dig the holes before the trees are even delivered. This will give you the opportunity to make sure each planting location is well drained and doesn't hold water for any length of time after rain.
Holes should be large enough to spread out the root system. Take care not to dig any deeper than necessary to avoid the chance of water collecting in a sump below the roots. A hole around 20cm deep and 40+cm across should be sufficient and can be deepened if required when the trees have arrived.
If the soil is hard and dry break up the bottom with a crow bar or pick to help water drain away and roots to penetrate. In dry conditions pour a bucket of water into each planting hole and wait until it has completely drained away before planting.
5. Plant the Tree
Finally, plant the tree being sure to keep the graft union above the soil and the trunk vertical. Backfill the hole with just the soil which was dug out*. Do not mix in compost and other additives which alter the structure of the soil, however a teaspoon or two of slow release fertiliser can be mixed in or spread on the surface. Tie the tree to a trellis or stake and firm the soil around the roots by lightly tamping it with a stick or your foot.
6. Staking
Staking is not necessarily essential for all newly planted trees. Many young deciduous trees will consist only of a single stem with few or no side branches after their initial prune. Except in very windy locations these are unlikely to need staking.
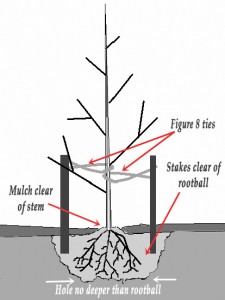
If a trellis or espalier frame is being used tie trees to that using soft elastic ties such as old stockings. Always use a figure eight tie to avoid damage to tree.
If no frame is used then support tree with two stakes as shown.
Trees can be staked or supported for at least their first year. Trees on M9 root stocks need some support throughout their life. Trees on M26 stock may be free standing if protected from the full force of prevailing winds. Trees on MM102, MM106 and MM111 stock will generally be self supporting after establishment.
6. Mulch and Watering
In many cases it will be helpful to form a watering saucer about 40 cm in diameter around the tree. This will catch any rain, prevent irrigation water form running off and help when hand watering with a hose or from a bucket. Water the newly planted tree thoroughly to settle the soil around the roots by filling the watering saucer and allowing the water to soak in over the whole root area. A seaweed additive mixed with the water is helpful although not essential.
TAKE CARE NOT TO OVER-WATER NEWLY PLANTED BARE-ROOTED TREES. Until the new tree has started actively growing, i.e. it is producing lots of new shoots and leaves, it just does not need a great deal of water. In many cases, particularly in mild spring weather with regular rainfall, a tree may not need supplementary water for several weeks or even months. Too much water around the roots can prevent trees from growing away, cause stunted growth or even kill the tree.
Mulching will reduce weed growth, slow water runoff after heavy rain and keep the soil surface moist and cool. Mulches vary from longer lasting materials like chipped timber and pine bark to those which need renewal once or twice per year including compost, pea straw and the like. Keep mulch from building up against the trunks of young trees.
*A warning about pre-digging and treating planting holes: DON'T! We want to encourage roots to spread so treat the whole area in the same way. The practice of filling a planting hole with all sorts of goodies whether done in advance or at planting time is not recommended. It can lead to a soggy mush forming after rain or watering or mimicking a pot with roots failing to move outside the modified soil mass. Either way the results are undesirable. In a well prepared orchard the proportion of a tree’s feeder roots occupying the planting hole after even a few months of growth is (or should be) quite low.